
7. 3D models
When you start creating 3D Models, you should be familiar with these terms:
- Part – a single component or body that you are designing
- Dimension – a constraint applied to edge length or surface size
- Assembly – an arrangement of parts to form a construction
- CAD – Computer Aided Design
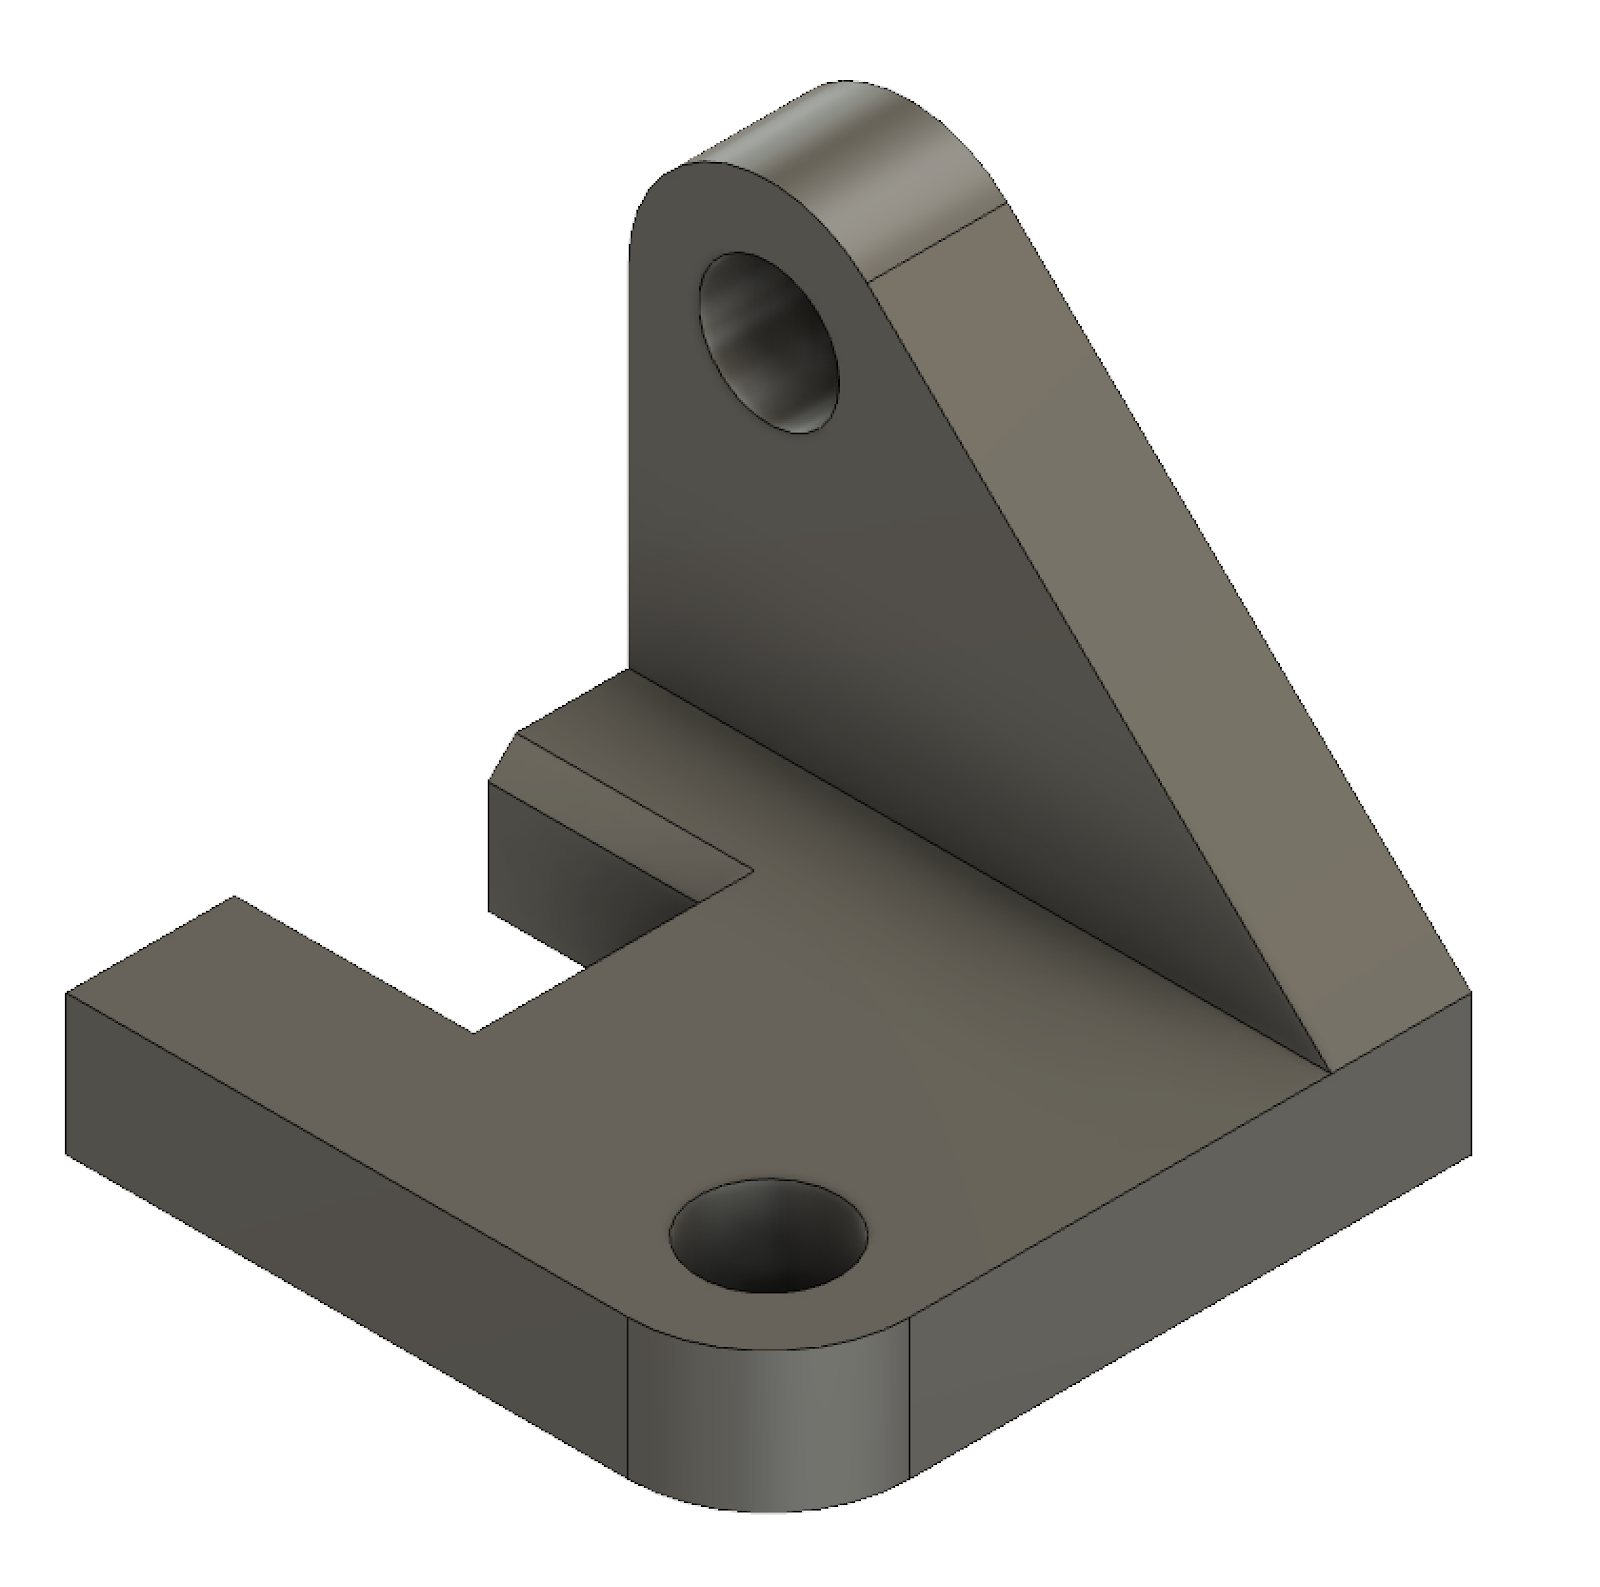
Types of 3D models
There are two types of 3D models that you might like to design:
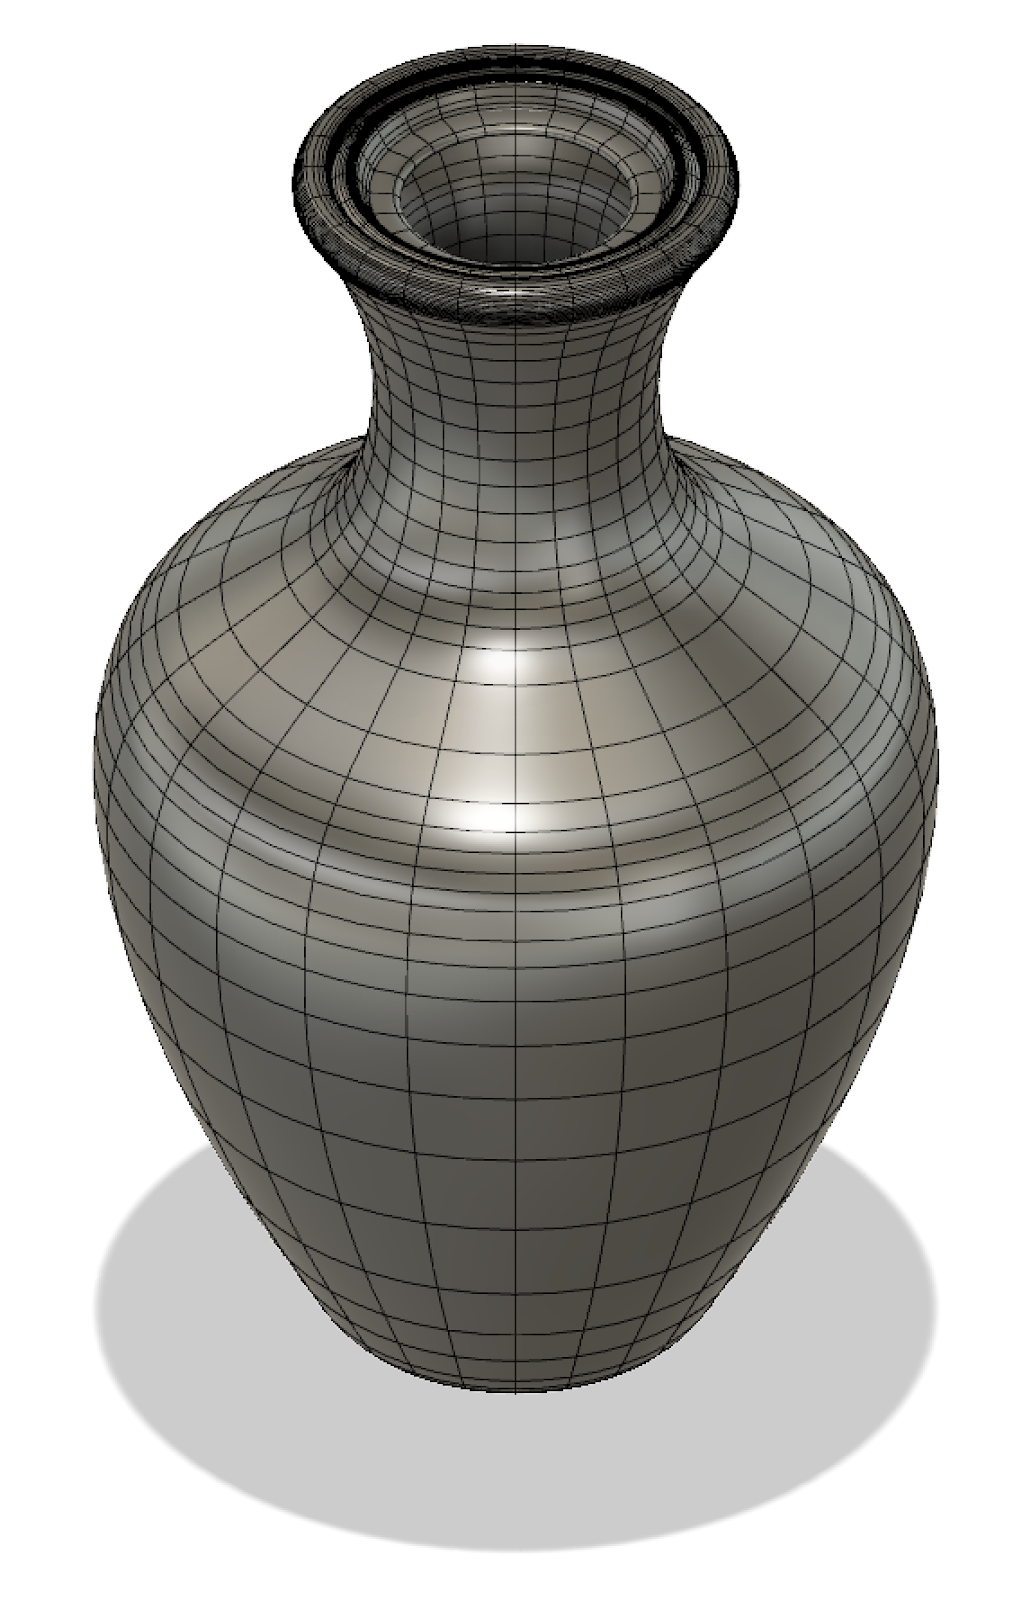
- Geometric models — components made entirely from lines, shapes and extrusions
- Organic models — involve using curves to sculpt a mesh to a desired form.
Geometric models are typically used for engineering and construction applications, while organic models are used in 3D animations and industrial design. A combination of both types is also possible.
Designing a 3D model for your assignment
Use this strategy to approach the design of a 3D model:
- Draw a rough sketch of the part with pencil and paper
- Annotate your sketch with dimensions, constraints or other key features
- Plan steps to convert your drawing to a digital model (e.g. sketch, extrude, fillet, etc…)
- Apply these steps in your 3D modelling software
- Refine your model according to other details from your sketch
- Verify that all dimensions and constraints were correctly applied.
Prepare your model for 3D printing
3D modelling software can export your model in a variety of formats. Depending on how or where you 3D print your model, these formats are typically used:
- A stereolithography file (.STL)
- A Wavefront 3D model file (.OBJ)
Steps for exporting your model in these formats are generally found in the help pages of the software you are using.
3D modelling software
Use of 3D modelling software largely depends on the model you are trying to create. If you are creating:
- a geometric engineering component, CAD software is usually the best option
- an organic model for 3D animation, then 3D modelling software is best.
Get more information on 3D modelling tools.
3D Photogrammetry software
Photogrammetry software is a very useful tool for constructing 3D Models from photographs. This can be done with photos from a phone or digital camera, and then the software’s algorithms do all the work. Visit 3D Photogrammetry tools for more information.
Ways to get 3D models
3D modelling can be used in a variety of ways. You can upload a 3D model for online interaction, 3D printing, animation or for use within VR/AR applications.
You can get a 3D model via:
- CAD or 3D Modelling software — 3D Models can be created from scratch using this software
- Photogrammetry — construct 3D models from photographs at the click of a button using specialised software
- MRI/CT Scan Conversion — extract a 3D model from any CT Scan or MRI data
- 3D Scanning — scanning an object with a 3D scanner
- Online Collections — download an online 3D model
Examples of 3D models you can create using photogrammetry. Press the play buttons to interact with each model:
Model of sculpture ‘A student’s head’ 3D Model
 Find existing 3D models
Find designs to download and use under a Creative Commons Licence from:
- Thingiverse — a MakerBot website for sharing 3D models
- Yeggi — 3D model search engine
- NIH 3D Print Exchange — a collection biomedical 3D models that include, anatomy objects, proteins, cells and tissues
Museum collections
Some museums are now making parts of their collections available as scans for home 3D printing:
- British Museum Exhibits on Sketchfab
- The New York Metropolitan Museum of Art on Thingiverse
- Smithsonian
