
3. Video
- Equipment for video and audio
- Plan your video
- Using your mobile phone
- Write a script
- Lighting
- Screen recording
- Video editing tools
Equipment for video and audio
Essential or very useful equipment:
- Video camera or smartphone — newer smartphones can record high quality video
- Microphone/audio recorder — an external microphone is preferable to the built-in one on your device
- Tripod — to avoid shaky footage
- Lights — for videoing indoors.
Your school or faculty may have equipment you can borrow to produce your video assignment.
You will also need storage for your video and audio files. High definition (HD, 1080p or 4K) video requires a lot of storage. The Work with data and files module has information on how to manage files and storage.
Plan your video
Remember to check your assignment criteria first and think carefully about the intended audience and purpose of your assignment.
Using your mobile phone
![]() Filming with your phone (YouTube, 15m16s) provides key information and many tips for filming a video on your mobile phone, including lighting, audio and editing:
Filming with your phone (YouTube, 15m16s) provides key information and many tips for filming a video on your mobile phone, including lighting, audio and editing:
Write a script
Write a script before you start recording so you:
- know what you want to say, and
- don’t forget to include important points.
If you improvise you might be too wordy, leave too many pauses and say too many “umms” and “ahhs” as you think about what to say next.
Script essentials
- Use a conversational tone
- Keep your sentences short and simple. Don’t use connecting phrases such as “so then…” or “ as previously mentioned…”
- Avoid repetition
- If you are doing a live recording, do a practice recording (or a few) before the real thing. Work on trying to sound natural
- Try to keep your video as short as possible. Viewers tend to be annoyed by lengthy introductions or interludes that just waste their time. Check the length requirements in your assignment instructions first.
Storyboard
The storyboard is used to plan the visual elements that will go with your script. Your video may include a combination of text, photos, graphics, audio and video.
The storyboard can be a simple document or drawing that maps out your video. You can use it to plan what video shots, text or images to show for each part of your script.
Use this example Google Doc storyboard template.
| Slide no. and approximate timing | Image, concept or idea | Script |
|---|---|---|
| Slide 1
15 seconds |
Show images of different types of ibis  |
The Straw-necked Ibis, Glossy Ibis and Australian White Ibis are native to Australia. Australians enjoy a love-hate relationship with the ibis, often referring to them as “bin chickens”. |
| Slide 2
20 seconds |
Video group of ibis in city near bins. Start with a wide shot of group. Then a close up of an ibis with its head going into a bin. Put source of information in — Friday essay: the rise of the ‘bin chicken’, a totem for modern Australia from the Conversation. | Brisbane has approximately 5000 ibis. Sydney’s ibis population is estimated at 10000. Hold onto your lunch extra tightly if you go down there.
|
| Slide 3
15 seconds |
 |
When you feel annoyed at an ibis, try to remember that drought and habitat loss have forced them from their inland wetland home to coastal regions. |
Note: It’s important to keep track of any sources and include them in your video.
Other storyboard templates are available for download.
 Script tutorials
- Writing your script (YouTube, 4m38s) looks at effective video script formats and the scripting process.
- Video script writing (LinkedIn Learning, 2h10m) has more in-depth instructions on planning, formatting and writing a script — a UQ login is required.
Lighting
When light comes from a single, direct source, such as the sun or an overhead light, it produces “hard light”. Hard light creates distinct shadows and can be harsh and unflattering. A “soft light”, produced by less direct sources of light, creates softer shadows and tends to be more flattering to your subject.
Outdoors, to have a soft light, it is best to video when the sun is not at it’s strongest:
- On a cloudy day
- An hour before sunset
- An hour after sunrise.
Indoors it is best to record:
- In a room that has a lot of natural light
- Use extra light or lamps as demonstrated in Lighting your video with available lights (YouTube, 1m50s).
Location
Choose a location that suits the theme of your video.
- Plan your shot carefully. Your audience is sure to notice something that appears in the background, that you didn’t intend to show
- Consider how noisy or windy it is, if you are recording audio while videoing
- Record in front of a green screen so that you can choose a different background and avoid a noisy environment. Find out how to record a video with a virtual background using Zoom software.
Video techniques
- Video in short takes. Then you can easily redo anything that doesn’t turn out quite right
- Video extra at the start and end, for easier editing
- Hold your camera horizontally while videoing to avoid having black spaces on the side, when you view it in wider formats
- Don’t video with strong light behind your subject. Preferably, video in a soft light or have the light behind the camera.


Avoid shaky video footage
If you can’t use a tripod, use a surface to balance your smartphone or video camera e.g. on a stack of books on a desk. If you have to hold your device:
- Use two hands
- Tuck your elbows in to your sides
- Stand with your feet shoulder-width apart
- Breath slowly.
Framing
You can compose different types of shots to make your video more interesting, such as wide shots and close-ups. Visit how to frame different kinds of shots.
When framing a video for an interview don’t have too much space above the subject’s head. Don’t cut off the top of the head either.
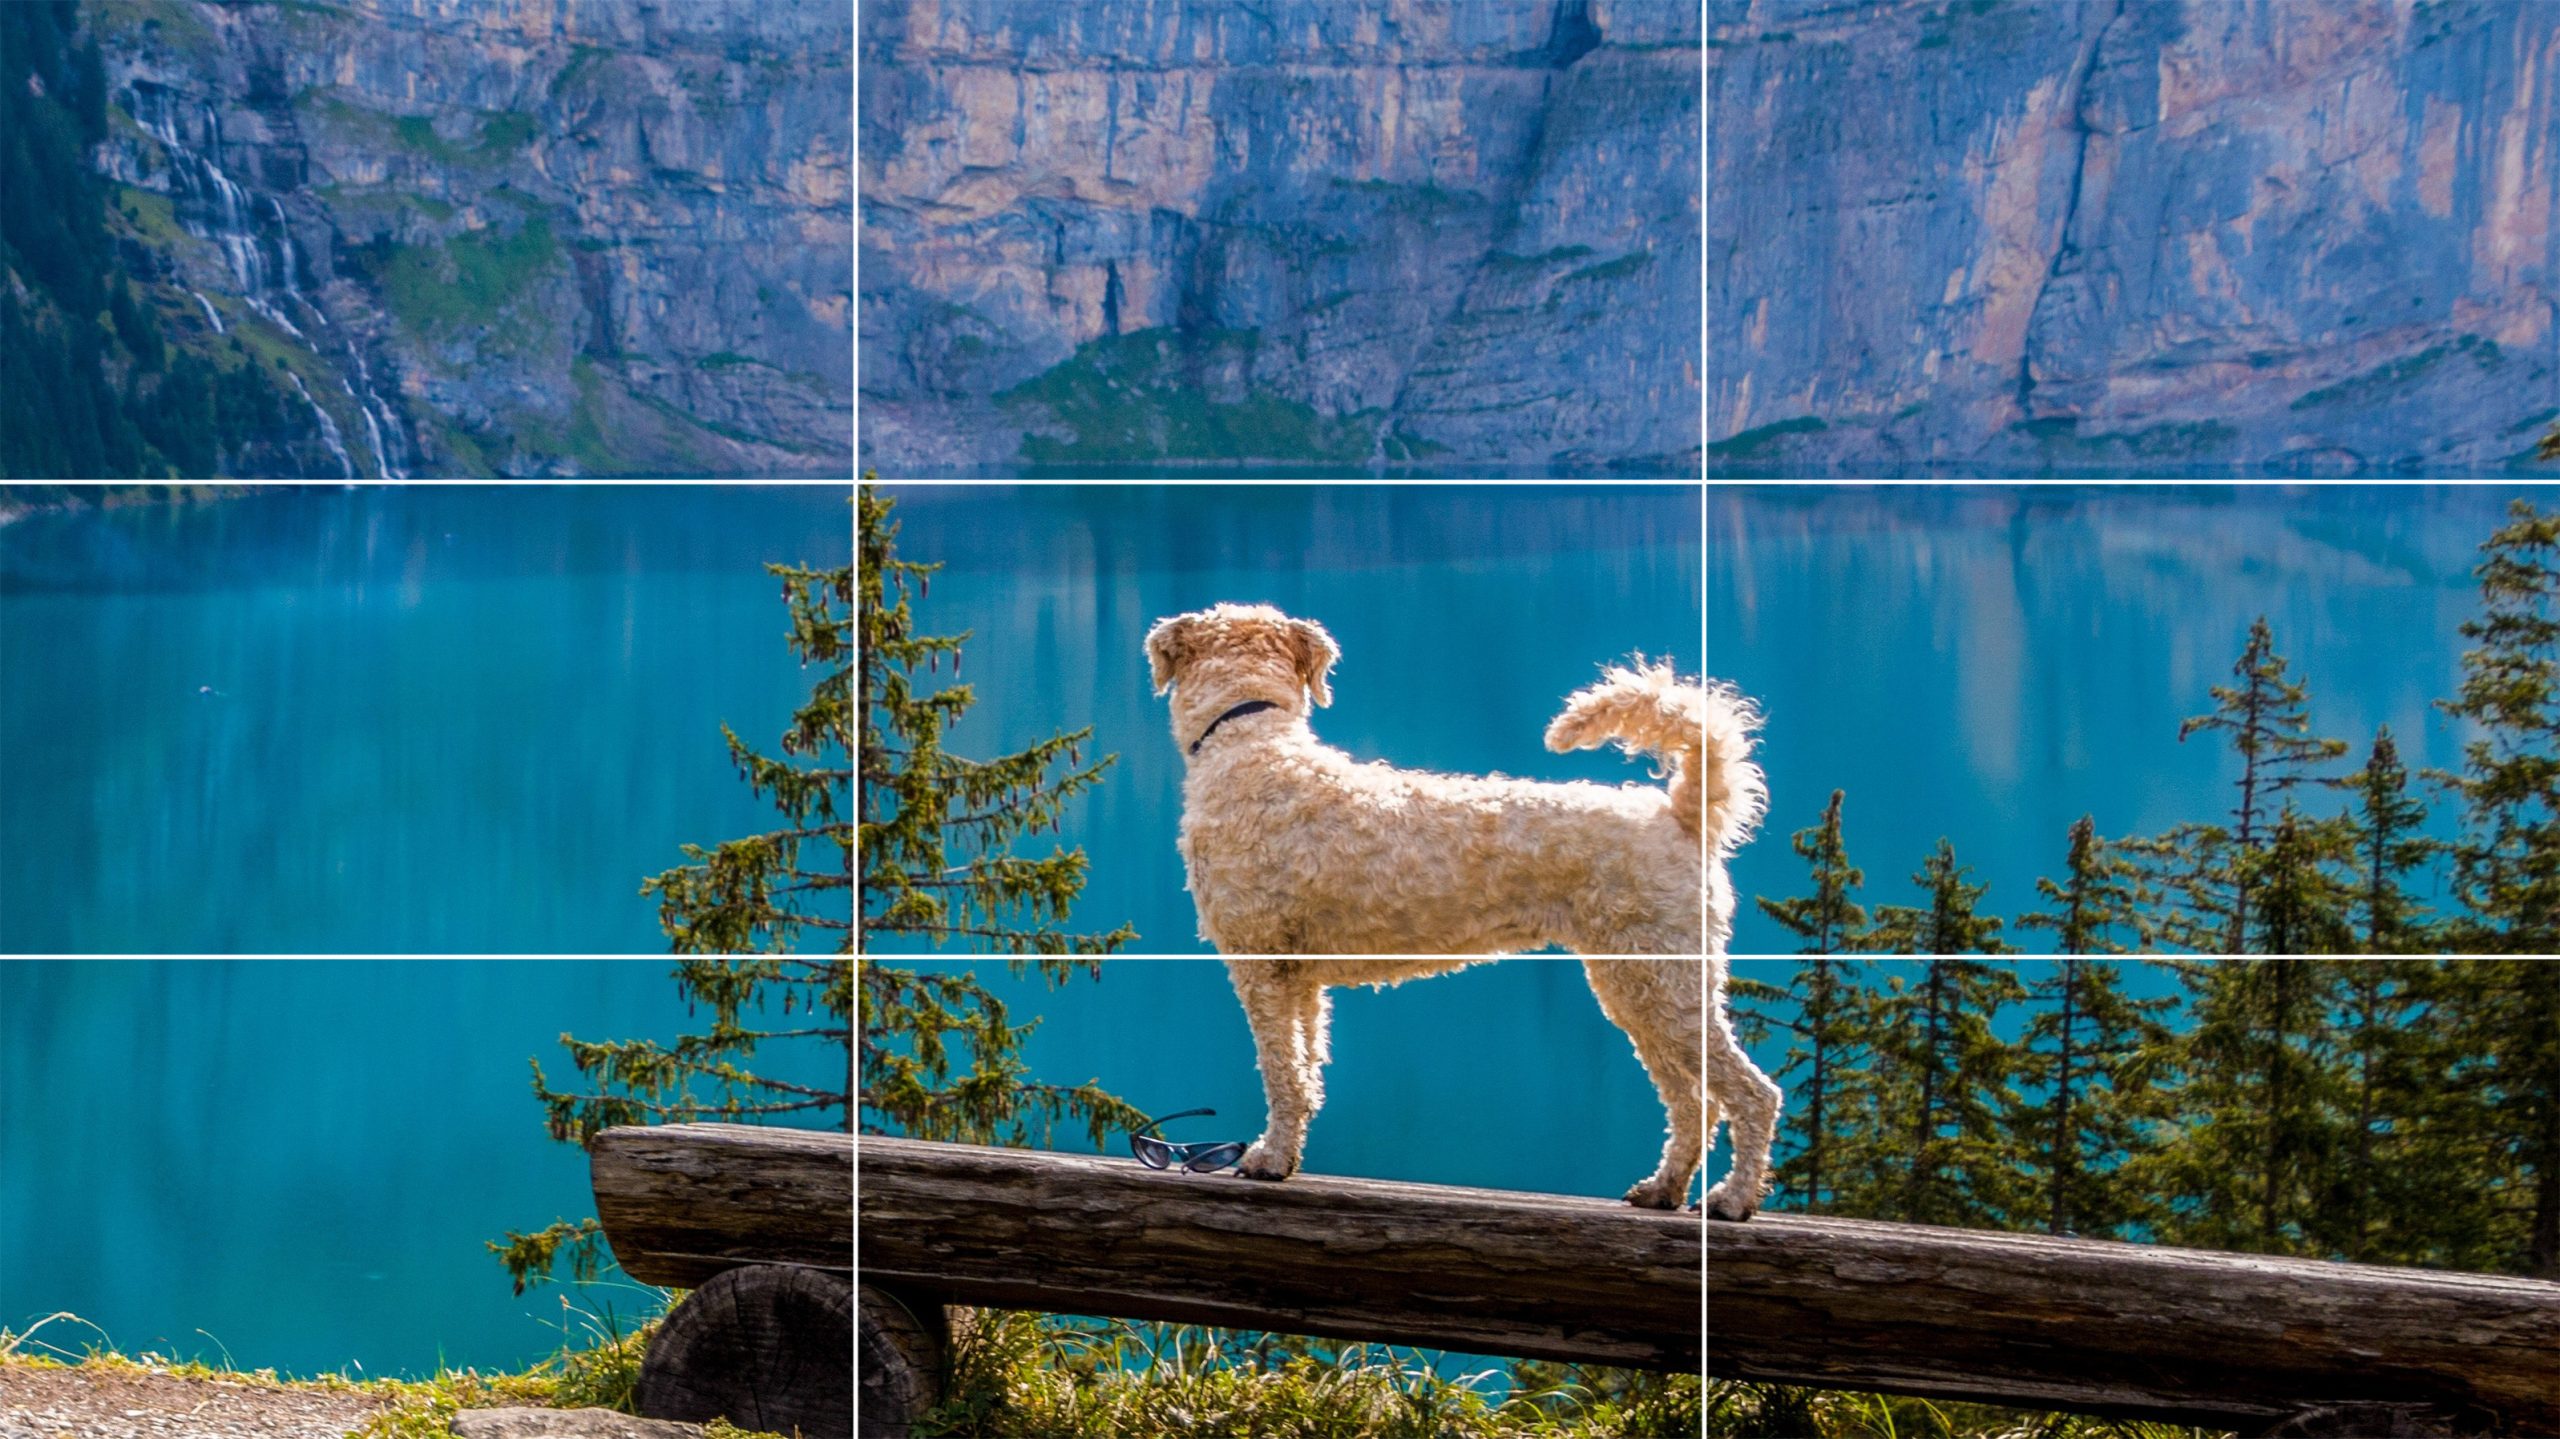
Rule of thirds
The “rule of thirds” is a composition technique for getting well-balanced shots. Imagine the scene broken into a 3 by 3 grid. Frame your shot to place your subject where the lines intersect.

Video tutorials
These tutorials have more techniques for creating videos:
- 20 tips for shooting great videos
- Learning video production and editing (LinkedIn Learning, 19m25s) — a UQ login required.
- Become a video editor (LinkedIn Learning, 1d8h) — UQ login required. Do this LinkedIn Learning Path to get a solid foundation in story structure, editing techniques, video compression and colour correction.
Screen recording
For instructional videos you may want to record your computer screen. Screen capture instructions and tools:
- Record your screen in PowerPoint
- How to record the screen on your Mac
- Screencastify is an extension for your Chrome browser that can record your screen.
Video editing tools
| Tool | Free | Limitations | Guides | Tutorials |
|---|---|---|---|---|
| iMovie (MacOS and iOS) | Yes | Good editing tool but for Mac and iOS users only | iMovie support | iMovie 10.1.16 Essential Training (LinkedIn Learning, 2h31m) UQ login required |
| Adobe Express | Yes | Free basic plan for creating simple videos incorporating images, text and voiceover. Express does not include many of the features of a fully-fledged video editing tool. You need an Adobe account to use Express. | Adobe Express tutorials | Learn Adobe Express (LinkedIn Learning, 1h16m) UQ login required |
| Adobe Premiere Pro | No | Complicated interface requires a bit of time to learn | Premiere Pro user guide | Premiere Pro (LinkedIn Learning pathway) UQ login required |
| Adobe Premiere Rush | Yes, free version available | Simpler to use than Premiere Pro. Free version limited to 3 exports and 2 GB of cloud storage. | User guide | Adobe Premiere Rush tutorials |
| Microsoft PowerPoint | Free for UQ staff & students | PowerPoint video and audio (LinkedIn Learning course) UQ login required | ||
| Powtoon | Yes, free online tool | Free plan can do up to 3 mins only. No download of videos but can share and upload to YouTube. | Powtoon QuickStart Guide | Powtoon Quickstart video tutorials |
Get more information on tools for working with video, including EchoVideo, Zoom and Adobe Spark.
Submitting your video assignment
- EchoVideo allows you to record video and audio. You can use it to submit video assignments for your courses.
- Record video or audio through EchoVideo has instructions on using Echo to submit video assignments.
Video hosting sites
After you have created your video, you can upload it to a video platform for others to view it.
| Site | Free account available | Guides | Tutorials |
|---|---|---|---|
| YouTube | Yes | Upload videos to YouTube | Create and manage a YouTube channel (LinkedIn Learning, 3h10m) UQ login is required |
| Vimeo | Yes | Vimeo Uploading basics | Vimeo School |
